Required System Role: Standard User
Required Team Role: Team Leader
Accessing Legacy Importer
Navigate to Tools -> Import from the top bar.
Then at top right click the 'Legacy Importer' button.

Import a single entity type and relate to existing records.
Using our dynamic import tool, Enterprise Administrators and Team Leaders can import bulk data directly from a .csv file into your Consultation Manager database.
This type of import will create one Record for each row of data in your spreadsheet, related to one existing Record per row.
To prepare your spreadsheet for import, you should create one row for each new Record and include one column that contains a unique reference to the existing record.
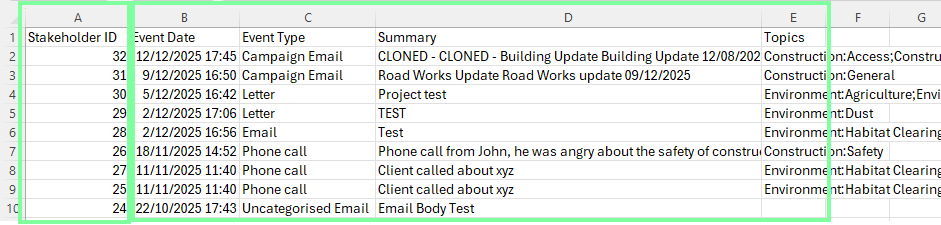
For example, import Events, related to existing Stakeholders via their ID Numbers. See the below example in which column A contains the reference to the existing Stakeholder Record and columns B-E contain Event information.
Once you have prepared your spreadsheet, navigate to Tools (1), Import (2) and click New (3).

This will open a new blade at the right. Here, select:
4. Project or Projects to associate your imported Records with
5. Record type you are importing - this will be the type of the new Records
6. Relationship operation: Create and relate to (multiple entities using CSV)
7. Relevant relationship - this should include the primary Record type and the type of Record you are linking to
After making the above selections, click [Choose] to upload your .csv (8).

After uploading your file, map each column to a field (9) from the main Record type that you are importing. You can skip over columns that you do not wish to include.

When you get to your unique reference column (10), be sure to select a field from the Secondary entity portion of the dropdown. This will tell the system where to look for this unique reference.
It's important to note that there must be a unique reference in each row that matches an existing record in the system. If a row is empty or doesn't find a match in the system, it can cause the import to fail.

Once all relevant fields have been mapped, click Save & Execute (11).

A pop-up will ask you to confirm the import. Click [Yes] (12).

The import will run and will then provide a result (see the example below).
