Legacy feature - How do I import data and link it all to a single existing record?
This article shows how to import one type of Record in bulk and relate the new data to a single existing Record.
Required System Role: Standard User
Required Team Role: Team Leader
Accessing Legacy Importer
Navigate to Tools -> Import from the top bar.
Then at top right click the 'Legacy Importer' button.

Importing data and relating to a Single existing record.
Using our dynamic import tool, Enterprise Administrators and Team Leaders can import bulk data directly from a .csv file into your Consultation Manager database.
This article shows how to import one type of Record in bulk and relate the new data to a single existing Record.
This will create the primary records, and link all of them to a single record already existing in the system.
The following example will create and link multiple Events to a single Stakeholder that already exists in the system.
To prepare your spreadsheet for import, you should create one row for each new Record in a .csv file.

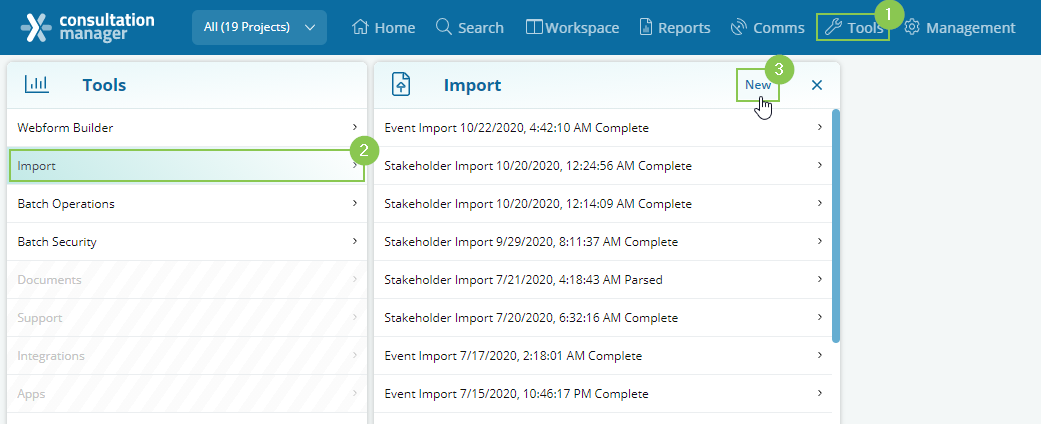
Once you have prepared your spreadsheet, navigate to Tools (1) > Import (2) and click New (3).
This will open a new blade at the right. In the importer tool, select:
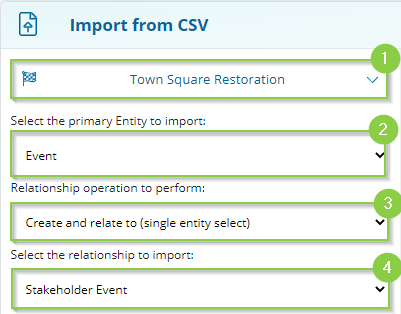
1. Project or Projects to associate your imported Records with
2. Record type you are importing - this will be the type of the new Records
3. Relationship operation: Create and relate to (single entity select)
4. Relevant relationship - this should include the primary Record type and the type of Record you are linking to
Selecting this option will open 2 other drop-down menus underneath where you can choose the information on the existing record you want to link it to. A common example for this selection is importing multiple Events and linking them to a specific Stakeholder.
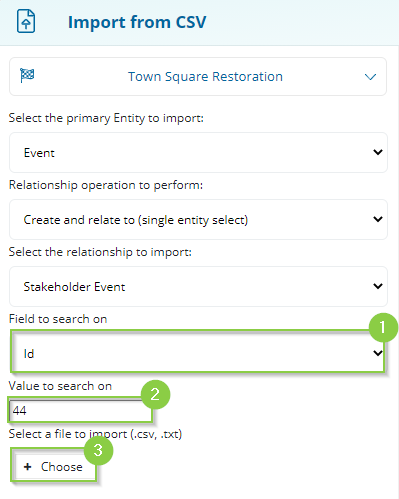
1. Field to search on: Depending on the type of record you're linking to, a variety of options will appear in this drop-down menu. For the most reliable results, we recommend choosing the record ID which can be found above the details on the record's profile.
2. Value to Search on: This is where you would enter the value the system should search for to link it to the applicable record. In this case, the Stakeholder's ID is 44.
After making the above selections, click 'Choose' to upload your .csv (3).
This will ‘parse’ the data in the spreadsheet to the right-hand side of the screen where you can map the columns to the fields on the entity you’re importing. At the top of each column will be a drop-down selector with all the fields you can select to import the data into.

Once you have mapped your columns to the corresponding fields, click ‘Save & Execute’ to run your import.

Once your import has been completed, it will let you know how many rows have successfully been imported.
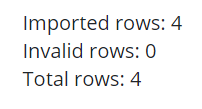
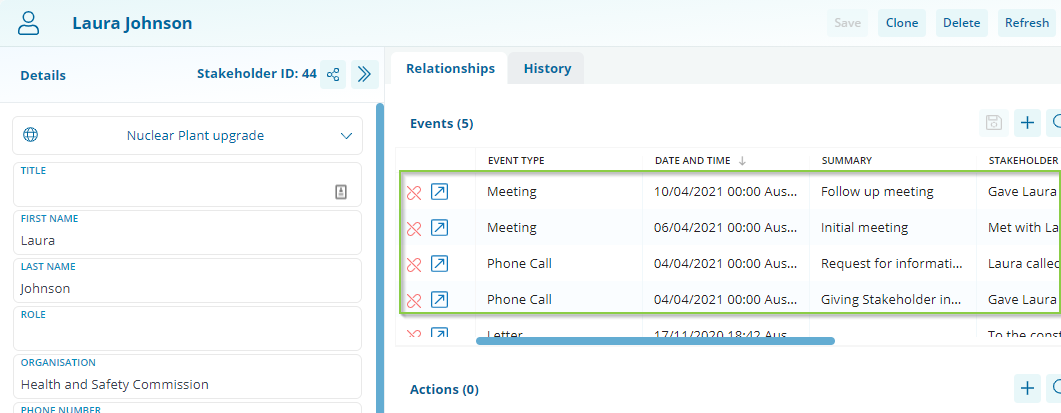
The next time you open that record, the newly imported records will appear linked on the right-hand side:
If you’re importing a large amount of data, you can navigate away from the importer page, and it will continue to run as you perform other tasks. You will get an email when the import has successfully finished.