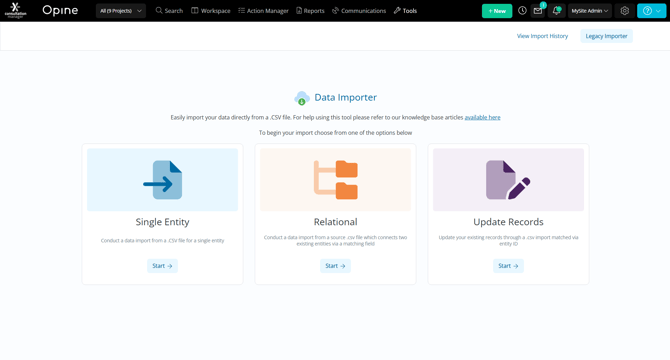
Getting Started
The “Update Records” import allows you to easily update existing records in Consultation Manger, you have the choice of updating an entire record or simply updating blank values.
After opening the import tool select “Start” on relational import to begin the import.
-
In the navigation bar click on “Tools”
-
From the dropdown menu select “Import”
-
On the Import screen select “Start” for the “Update Records” Import.
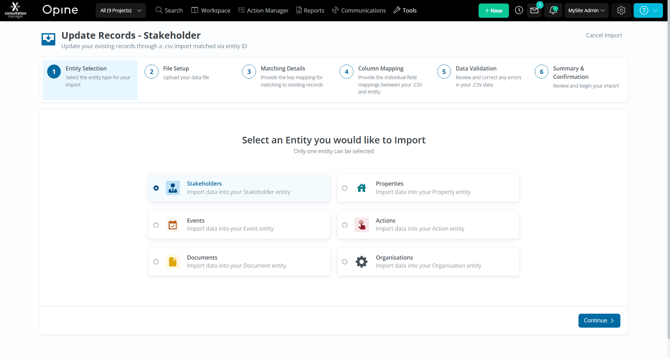
01 Selecting Entity to Update
The “Update Records” import requires you to first select the entity that you would like to update. In this case we have selected Stakeholders.
-
Select the entity
-
Click “Continue” to proceed with the import
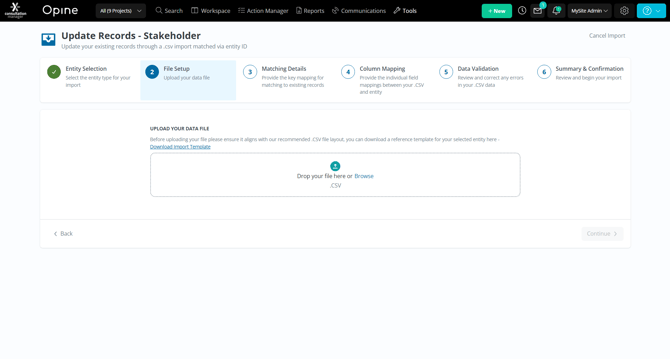
02 Upload the CSV
Once you have selected the entity you will need to upload a CSV containing the data you would like to update. To get started try downloading our Template.
-
Download and complete the “Import Template.”
-
Click “Browse” or drag a CSV on to the box in the middle of the screen to begin the upload.
-
Once the upload is complete click “Continue” in the bottom right to go to the next step.
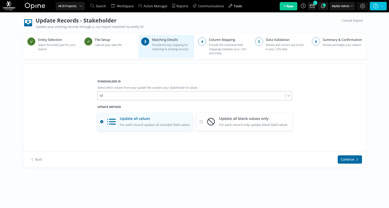
03 Matching Details
Once the CSV has been uploaded you will need to select the ID column that Consultation Manager can use to identify the entities. If you are using the template this column will be called “Id.”
You will also need to select what method of update you would like to use. You can choose “Update all values” which will overwrite any existing data or you can chose “Update all blank values only”.
-
Use the dropdown to select the ID column from your column names.
-
Select the update method.
-
Use continue in the bottom right hand corner to move to the next step.
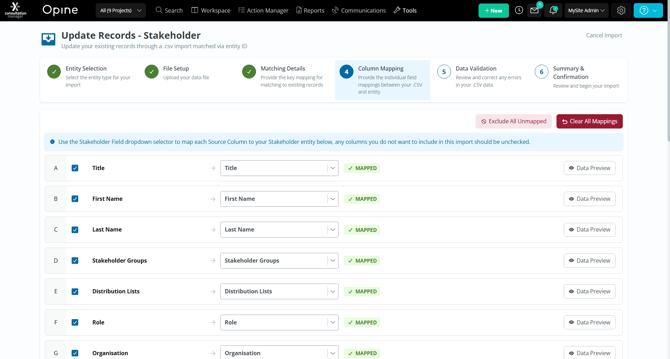
04 Column Mapping
The next step is to match the outstanding column titles with the field names in Consultation Manager. If you have used the template or your column names already match Consultation Manager these will be mapped automatically.
-
Map column titles against the field name by using the dropdown
-
If there are any columns you don't wish to map or exclude use the “Exclude all Unmapped”
button in the top right or unselect the row using the check box. -
Once you completed the mapping and excluded any unmapped columns click the “Continue” in the bottom right to go to the next step.
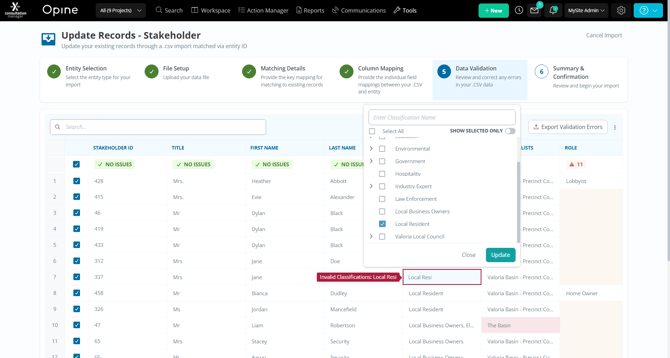
05 Data Validation
During your upload Consultation Manager will perform data validation across your import. From the Data Validation screen you can identify issues and update data directly within the import tool by editing cells.
-
Edit cells as required by clicking on them and updating the values.
-
If there are any outstanding errors skip them by using the “Skip Invalid Rows” button in the button right of the screen.
-
Once you have resolved any errors click the “Continue” in the bottom right to go to the next step.
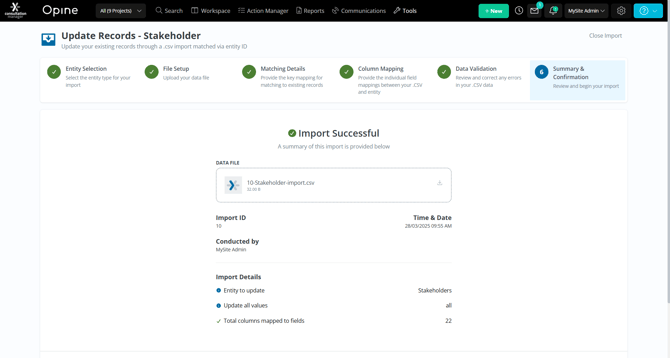
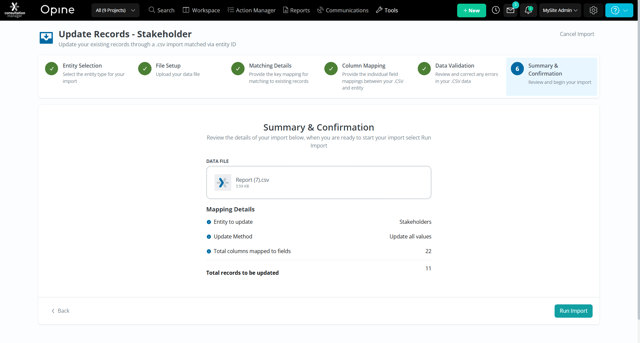
05 Complete Upload
Once you have completed the validation all that is left is to run the import. Confirm the Entity being updated, the update method and the number of records being updated then run the update.
-
Confirm the Entity being updated.
-
Confirm the update method.
-
Confirm the number of records being updated.
-
Click the “Run Import' button in the bottom right to initiate the update.
-
Wait for the update to complete, please note you can navigate away from this screen while the update is progressing.
-
Once the update is complete you will be taken to the import summary screen, if you navigated away during the update you will be notified via the Notification Centre in the top right.
06 Success
Congratulations you have successful updated your records.