How to merge two classification types together
Required System Role: Enterprise Admin
Why would I need to merge my classifications?
It's not uncommon for your Issues list, Event Types, or any other types of Classifications to get away from you, and you find that you might need to consolidate some options.
Some common examples include:
-
Project/s changing reporting requirements
-
Accidental duplication
-
Capturing the data in different/evolving ways
Our Merge Classifications tool allows you to put all the data under one option quickly and easily.
How to merge your classifications
Please note: In order to utilize the merge classifications tool, it is necessary to have Enterprise Administrator access permissions. If you do not have this access, please reach out to your internal Enterprise Admin for assistance.
First, go to the Management section by clicking the cog icon in the top right-hand corner of the screen (1). Once the Management section is open, select the Merge Classifications option (2).

This will open up an area that will step you through the process of selecting and merging your classifications.
You can merge any classification in your system (i.e. Event Types, Stakeholder lists, etc.), but for this example, we will be merging two Issues together: Flora, and Fauna, to create a single Issue called Flora and Fauna.
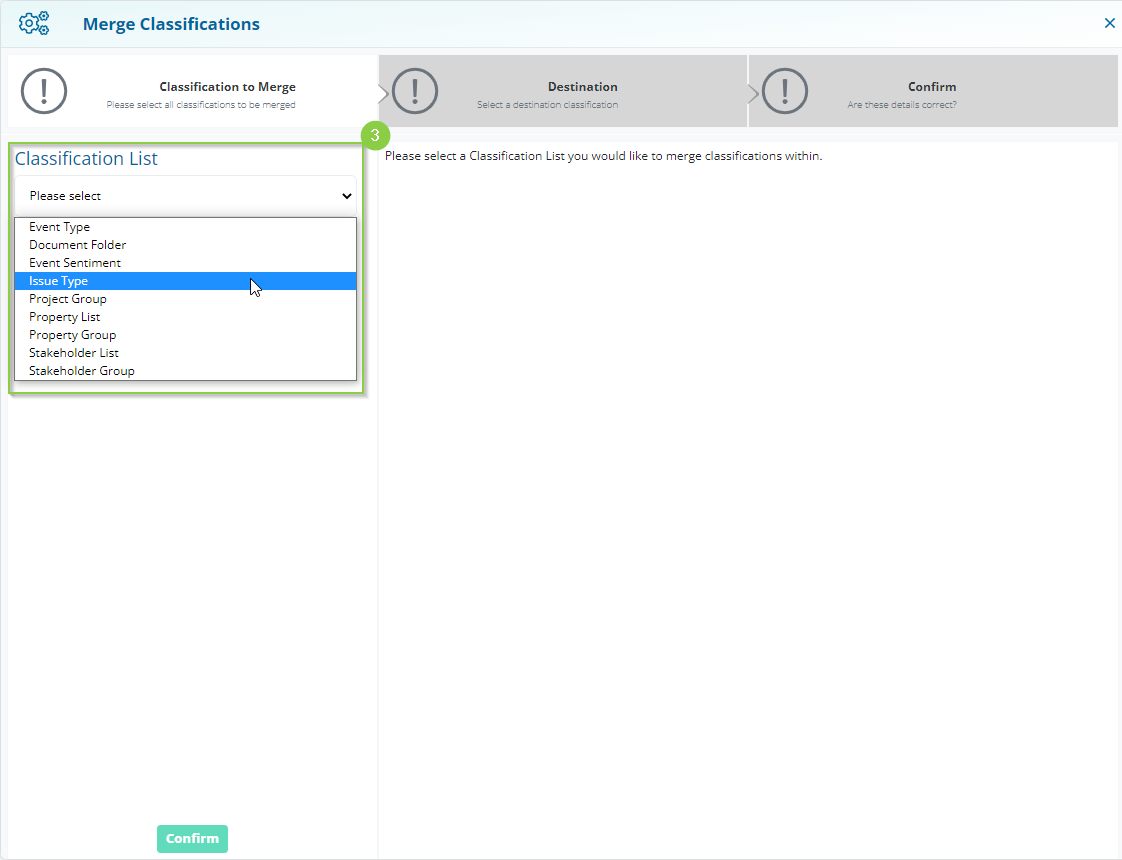
The first step is to choose the type of classification you need to merge. For example, if you needed to merge two Stakeholder groups together, select Stakeholder Group.
For this example, we'll choose Issue Type (3).

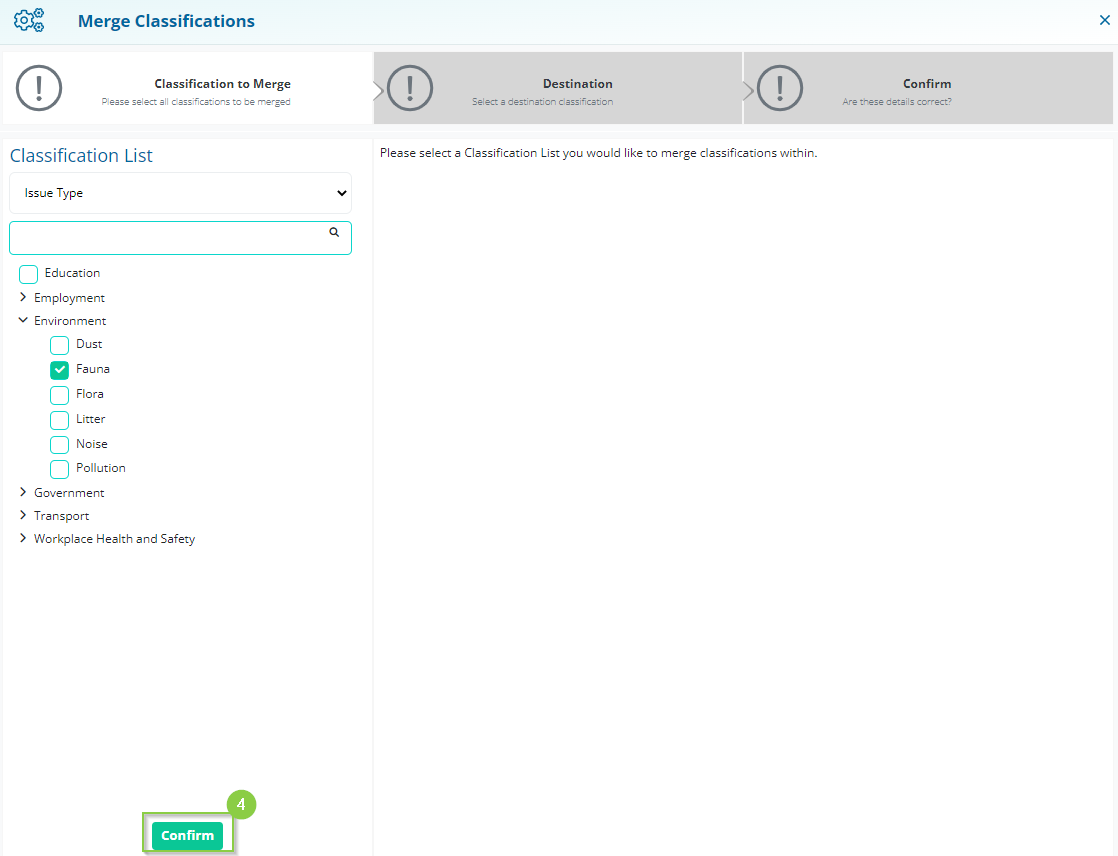
This will make all options in that Classification appear.
Select the classification you would like to keep and click 'Confirm' (4) to move to the next step.

Tip: To make it easier for you to identify the Classification you want to keep before merging, we recommend renaming it. This way, you can quickly locate and select the correct Classification during the merging process.
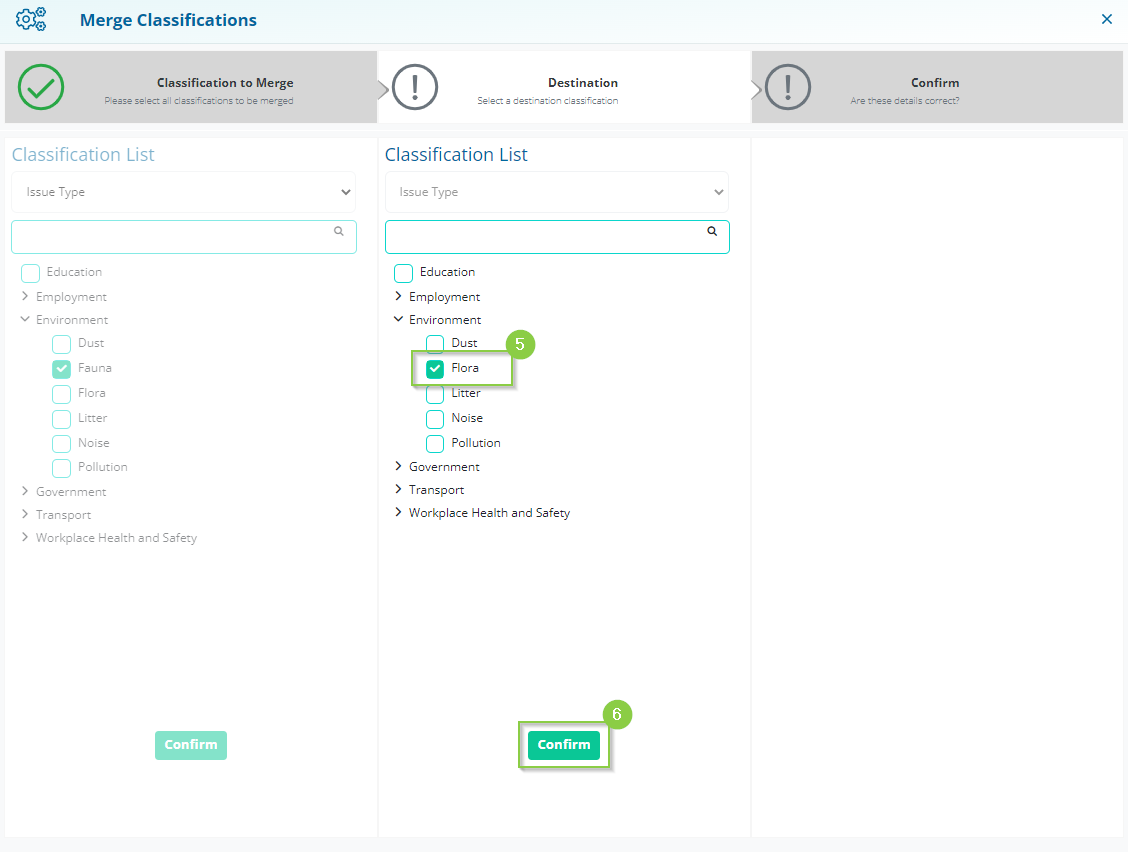
Clicking Confirm will take us to the next step, where we can select the Classification we want to merge (5) with the first one and click 'Confirm' (6).

Confirming the second step will lead us to a final confirmation section where we can review the changes to be made (7) and Confirm (8).

One final Confirmation message will appear before completing this merge.
Please be aware that this change cannot be reversed.
As part of the Classification merge, any records linked to the Classification chosen in Step 2 will be tagged with the Classification selected in Step 1. The Classification selected in Step 2 will also be deleted.
Reminder: It may be necessary to modify the name of the Classification to which all the records have been merged.
